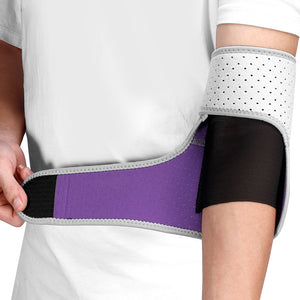
Elbow Ice Compression
- Black
- Grey
- Blue
- Purple
- Pink
- Black
- Dusty Blue
- Blue
- Pink
- White
- Pink
- White
- Yellow
- Purple
- Black
- Black
- Grey
- Grey
- Black
- Blue
- Grey
- Blue
- Black
- Black
- Blue
How to Wrap an Elbow with Ice?
To wrap an elbow with ice, position the arm comfortably, place a protected cold pack over the injured area, and secure it firmly with a flexible wrap to provide consistent compression without cutting off blood circulation. This combination of cold and pressure helps minimize swelling and temporary pain from sudden injuries or repetitive strain.
Step 1: Gather Your Supplies
Proper preparation ensures the application is both safe and effective. Before starting, collect the following items:
A Cold Source: A dedicated gel ice pack, a bag of crushed ice, or a bag of frozen vegetables.
A Protective Barrier: A thin towel, pillowcase, or cloth to prevent direct skin contact with extreme cold.
A Compression Tool: High-quality elbow wraps or an elastic medical bandage to hold the cold source in place.
Step 2: Prepare Your Ice Pack
The cold pack must conform easily to the joint's unique anatomy. Before application, follow these preparation steps:
Shape the Pack: If using raw ice cubes, crush them slightly so the bag can mold to the arm's curves.
Create a Barrier: Wrap the selected cold source entirely in the thin cloth or towel to safeguard the skin.
This layer allows the therapeutic cold to penetrate deep into the muscles and tendons while avoiding frostbite.
Step 3: Position the Arm
Finding a stable posture helps keep the elbow immobilized during the application process, preventing further strain on the joint. Consider these two setup options:
Option A: Rest the arm on a flat surface, such as a table or a cushion, with the joint bent at a relaxed 90-degree angle.
Option B: Keep the arm fully extended on a supportive surface if bending causes discomfort.
Choose the position that creates the least amount of tension in the upper arm and forearm.
Step 4: Apply the Cold Source
Carefully center the covered ice pack over the specific area experiencing discomfort or puffiness. Ensure the application covers the necessary zones:
Target the Center: Place the pack directly over the main source of the irritation.
Cover the Sides: Ensure the pack wraps around the bony prominences on the sides and the back of the elbow.
Managing an elbow issue effectively often requires covering the entire joint structure to ensure uniform cold distribution.
Step 5: Secure for Moderate Compression
Use an elastic bandage or specialized elbow wraps to secure the cold pack in place. Follow this wrapping sequence for the best results:
Step A: Start wrapping a few inches below the ice pack, moving upward toward the shoulder.
Step B: Overlap each layer of the wrap by about half its width to ensure even pressure.
Step C: Check the tension frequently to make sure the wrap is snug but not constricting.
The wrap needs to be snug enough to provide compression, but not so tight that it causes numbness, tingling, or increased pain.
Step 6: Timing the Application
Managing cold exposure is vital for a safe recovery process. Maintain a strict schedule during the routine:
Active Period: Keep the compression wrap on for 15 to 20 minutes.
Rest Period: Remove the pack and allow the skin temperature to return to normal for at least 40 minutes before reapplication.
This alternating schedule helps maintain healthy localized blood flow while managing localized swelling.
Step 7: Observe the Joint
Pay close attention to how the arm responds during and after the session. Monitor the area for these specific signs:
Visual Changes: Note any reductions in visible swelling or surface puffiness.
Skin Sensation: Check for normal feeling and color; if the skin looks unusually red or loses sensation, remove the wrap immediately.