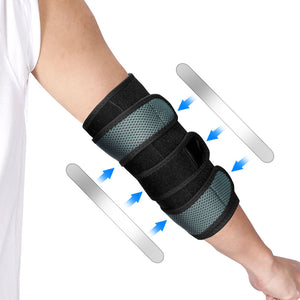
Ankle Correction Brace
- Black
- Grey
- Blue
- Pink
- Purple
- Black
- Orange
- Green
- Pink
- Black
- Red
- Blue
- Orange
How to correct ankle alignment with an ankle correction brace?
Maintaining proper ankle alignment is fundamentally crucial for both injury recovery and long-term injury prevention. When your ankles are out of alignment, whether they are rolling inward (overpronation) or pushing outward (supination), it creates a negative chain reaction of stress throughout your entire body. Unaddressed ankle misalignment can quickly lead to chronic foot pain, joint instability, knee discomfort, and even severe lower back issues.
Fortunately, utilizing targeted support can gently guide your joints back into their natural anatomical position.
Understanding the Causes of Ankle Misalignment
Before attempting to correct your stance, it is incredibly helpful to understand why your ankles may be resting in an improper position. By targeting the root cause, you can achieve faster and more sustainable relief. Common causes include:
- Flat Feet or Fallen Arches: A lack of natural arch support often causes the ankles to collapse inward, leading to severe overpronation.
- Previous Injuries: Untreated or poorly rehabilitated ankle sprains can leave ligaments stretched and weak, resulting in chronic ankle instability.
- Poor Footwear: Regularly wearing unsupportive shoes can alter your natural gait cycle and force your feet into awkward angles.
- Muscle Imbalances: Weak calf, shin, or intrinsic foot muscles may fail to hold the ankle joint in a neutral, upright position during physical activity.
Step-by-Step Guide: How to Correct Ankle Alignment
1. Assess Your Current Condition
Before integrating an ankle correction brace into your daily routine, you must carefully evaluate the root cause of your misalignment. Is it driven by structural issues like flat feet, or is it the lingering result of a past athletic injury? In many instances, securing a professional assessment—such as an X-ray or a physical evaluation from a healthcare provider or podiatrist—is highly recommended to rule out more severe underlying joint conditions.
2. Select the Right Support
Choosing the correct stabilizing gear is essential for achieving a neutral foot posture. Look for an option specifically designed to provide structured stability and alignment correction. A high-quality brace typically features customizable, adjustable straps and a rigid or semi-rigid outer shell. This specific design limits excessive side-to-side motion while actively promoting the proper anatomical positioning of your foot and lower leg. Always ensure a snug fit that supports the joint without causing pinching, discomfort, or restricted blood circulation.
3. Apply the Brace Properly
Correct application determines exactly how effective your alignment correction will be. Follow these steps for the best results:
- Prepare the gear: Begin by fully loosening all straps, laces, or fasteners on the support system.
- Position your foot: Rest your foot into the brace while holding it in a neutral, 90-degree alignment. Your foot should neither be pointed downward (plantarflexed) nor pulled excessively upward (dorsiflexed).
- Secure the fit: Fasten the straps snugly, starting from the bottom near the toes and working your way up the leg. This ensures that the pressure is evenly distributed across your entire foot and ankle complex.
- Check your circulation: The support should provide firm, adequate pressure to correct your alignment, but it must never be too tight. You should easily be able to wiggle your toes and feel normal warmth and blood flow in your extremities.
4. Adopt a Gradual Wear Schedule
Your muscles, tendons, and ligaments need adequate time to adjust to their new, corrected position. Initially, wear the support for shorter periods—such as an hour or two a day—and gradually increase the duration as your body adapts. Attempting to force an overcorrection by wearing the support all day from the start can lead to deep muscle fatigue, cramping, and unnecessary discomfort.
5. Combine with Physical Therapy and Strengthening Exercises
While external support is a highly effective tool, it should not act as a permanent substitute for natural muscle strength. In conjunction with wearing your support gear, performing targeted exercises is vital for long-term alignment correction. Focus on movements that strengthen the surrounding calves, shins, and feet, while also improving your overall range of motion. Working directly with a physical therapist can help you develop a personalized, progressive exercise regimen tailored to your specific biomechanical needs.
6. Monitor Progress with Regular Follow-Ups
Continuous misalignment or ongoing pain may indicate a need for a shift in your treatment plan. This could involve upgrading your daily footwear, adding custom orthotic insoles, or exploring more targeted physical interventions. If joint pain, swelling, or instability persists despite consistent use of your stabilizing gear, it is imperative to consult with a healthcare professional for a more in-depth evaluation.
The Long-Term Benefits of Proper Alignment
Actively working to realign your ankles pays massive dividends for your overall physical health. It dramatically reduces excessive strain on your ligaments, tendons, and muscles, lowering your risk of future sprains and stress fractures. When utilized as part of a holistic, comprehensive treatment plan that includes adequate rest, active rehabilitation exercises, and professional guidance, your support gear becomes a powerful catalyst for achieving a balanced, active, and pain-free lifestyle.