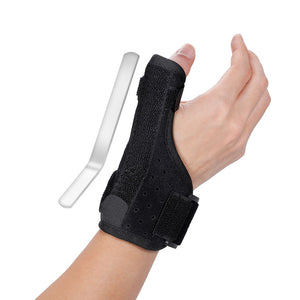
XL Ankle Brace
- Black
- Grey
- Blue
- Pink
- Purple
- Black
- Red
- Blue
- Orange
- Black
- Orange
- Green
- Pink
How to Measure an Ankle Brace?
Whether you are recovering from an unexpected ankle sprain, managing chronic joint instability, or looking for preventative support during your favorite sports, selecting the correct ankle brace size is critical. Accurate measurements are essential for achieving optimal support, targeted compression, and all-day comfort.
Ankle braces come in a wide variety of shapes, styles, and sizes. Guessing your size or choosing an incorrect fit can lead to inadequate joint support, painful chafing, or even restricted blood circulation. This comprehensive sizing guide outlines exactly how to properly measure your ankle and foot to ensure you receive the perfect fit for your recovery needs.
Why Accurate Ankle Brace Sizing Matters
Before diving into the measurement steps, it is important to understand why precision matters. An ankle support sleeve or lace-up brace works by compressing the joint, limiting unwanted side-to-side movement (inversion and eversion), and promoting healthy blood flow to speed up recovery.
If a brace is too loose, it will slide around and fail to stabilize the ligaments. If it is too tight, it can pinch the skin, cause numbness, and increase swelling. Taking two minutes to measure your foot and ankle circumference correctly is the best way to ensure your protective gear does its job effectively.
Step 1: Gather Your Measuring Tools
To measure your ankle accurately at home, you will need a few basic items:
- A flexible measuring tape (often used for sewing or tailoring).
- A piece of blank paper (large enough to fit your entire foot).
- A pen or pencil.
- A flat ruler.
Pro Tip: If you do not have a flexible measuring tape on hand, do not worry. You can easily substitute it with a standard piece of string or yarn. Simply wrap the string around your ankle, mark the overlap with a marker, and lay the string flat against a rigid ruler to measure it in inches or centimeters.
Step 2: Measure Your Ankle Circumference
Most sizing guides base their recommendations on the circumference of your lower leg. Follow these steps to get an accurate number:
Locate the Correct Measuring Point
Sit in a comfortable chair with your foot resting flat on the ground. You need to find the narrowest part of your ankle, which is typically located right above the bony protrusions on the sides of your leg (the medial and lateral malleolus).
Wrap the Measuring Tape
Take your flexible measuring tape and wrap it completely around this narrow section of your lower leg. Ensure that the tape is snug against your skin but not pulled so tight that it digs in. You want to account for healthy circulation and everyday comfort.
Record the Measurement
Note the exact number in both inches and centimeters, as different sizing charts may use different metrics. If you are experiencing acute swelling from a recent injury, it is highly recommended to measure your ankle when the swelling is at its peak (usually in the evening) so your brace does not feel overly restrictive later in the day.
If your measurements fall in the higher percentiles, or if you naturally have a broader bone structure, opting for an XL ankle brace is an excellent way to guarantee you receive robust support without compromising your circulation.
Step 3: Measure Your Foot Size and Width
While ankle circumference is the primary metric, many supportive sleeves and rigid stabilizers also factor in your standard US shoe size. A thorough foot measurement is incredibly helpful for finding a comfortable fit.
Stand on a Flat Surface
Place your blank sheet of paper on a hard, flat floor. Stand up straight and place your bare foot entirely on the paper. Keep your weight evenly distributed.
Trace Your Foot
Using your pen, trace a complete outline of your foot. Make sure to keep the pen perfectly straight and perpendicular to the paper. Angling the pen inward or outward will result in an inaccurate, skewed measurement.
Measure the Length and Width
Once you have your outline, use your ruler to measure the distance from the very back of your heel to the tip of your longest toe. Next, measure the widest part of your foot (usually across the ball of the foot). Recording both the length and the width is especially important if you have wide feet and need a specialized plus-size ankle brace that will not pinch or bind around the arch.
Step 4: Consult the Manufacturer’s Size Chart
Once you have documented your ankle circumference and foot dimensions, compare them against the sizing chart provided for the specific brace you want to buy.
- If you are between sizes: The general rule of thumb is to size up if you prefer a more comfortable, everyday fit, and size down if you require strict, high-level compression for athletic activity.
- Check the shoe size correlation: Ensure your standard shoe size falls within the recommended ankle circumference range.
Each brand has unique design specifications, so a "Large" in one style might be a "Medium" in another. Always trust your physical measurements over generic letter sizes.
Final Considerations: The Fit Test
Acquiring the correct measurements is only the first part of the process; testing the physical fit is the final, crucial step.
Perform a Movement Test
Once your gear arrives, put it on and wear it around the house for 15 to 20 minutes. You should be able to flex your foot up and down freely while feeling sturdy side-to-side restriction. If the material bunches up uncomfortably, causes your toes to tingle, or feels excessively loose when you walk, you may need to exchange it for a different size.
Utilize Adjustable Features
Many modern stabilization braces feature adjustable figure-eight straps, laces, or hook-and-loop closures. Utilize these features to customize your compression levels. You might need to loosen the straps on days when you experience extra swelling and tighten them on days when you need maximum athletic support.
By taking the time to carefully measure your ankle and foot, you take a vital step toward safer movement and faster rehabilitation. Proper sizing not only dramatically enhances daily comfort but also maximizes your brace's structural integrity, ensuring your joints remain protected with every step, jump, and stride.