How to Measure Shoulders Chest and Arms for a Shoulder Brace
With the weekend rapidly approaching, marking the unofficial kickoff to summer, many of us are dusting off our gear for family softball games, weekend kayaking trips, and long hikes. It is the perfect time of year to get active. But if you are dealing with shoulder discomfort, you might be looking for some extra stability to keep you in the game.
You do your research, order a double shoulder support brace, and excitedly try it on—only to find it slipping down your back or pinching your underarms. Sound familiar?
The root cause of almost all brace-related frustrations isn't a defective product; it is inaccurate sizing. A brace is not like a standard t-shirt where "close enough" will do. It relies on precise tension and targeted support to work effectively. If you are guessing your size based on your standard apparel, you are setting yourself up for an uncomfortable summer.
Let's dive into exactly how to measure your body so you can find the perfect fit and get back to enjoying those warm-weather activities pain-free.

The Foundation: Why Precise Measurement Matters
Before we grab the measuring tape, it is important to understand the why behind the numbers. Whether you are using a double shoulder compression sleeve for athletic stability or a dedicated shoulder brace for bursitis to aid in recovery, the garment relies on optimal surface contact.
If the measurements are too large, the brace cannot provide the necessary compression to stabilize your joints, leading to a false sense of security. If the measurements are too small, you risk restricted movement, painful chafing, and even reduced circulation.
The Tools You Need:
- A soft, flexible fabric measuring tape (do not use a metal retractable hardware tape—it will not contour to your body).
- A pen and paper (or your smartphone's notes app).
- Ideally, a friend or family member to help. Getting accurate back and shoulder measurements by yourself is notoriously difficult.
Step-by-Step: How to Measure Like a Pro
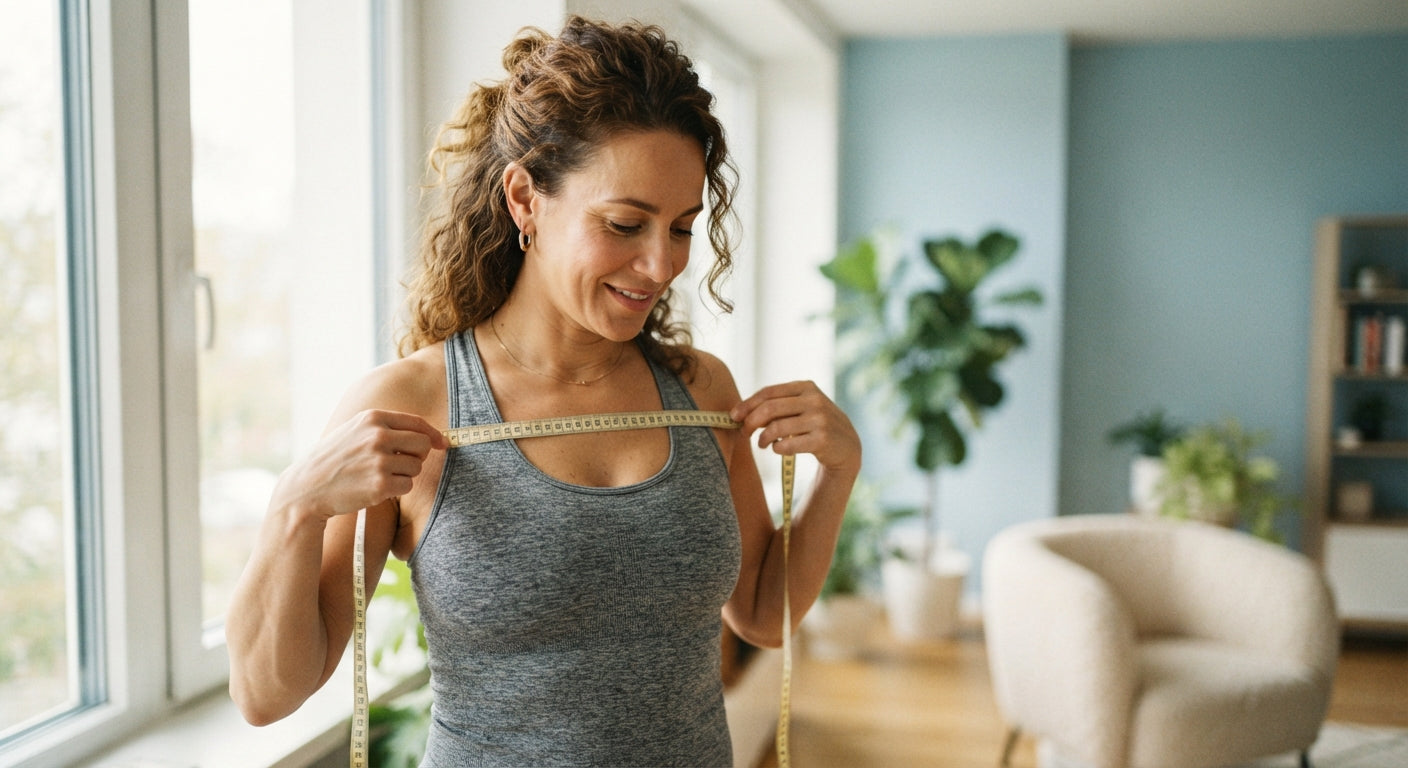
To ensure your measurements align perfectly with standard sizing charts, you will need to capture four specific numbers. Stand naturally, breathe normally, and let your arms hang loosely by your sides.
1. Shoulder Circumference
How to measure: Wrap the tape measure completely around both shoulders, crossing over the broadest part of your upper chest and upper back.
Why it matters: This establishes the overall "loop" size of the brace, ensuring it can comfortably wrap around your entire upper torso without compressing your breathing. Ensure the tape is perfectly horizontal to the floor; if it dips in the back, your measurement will be artificially large.
2. Shoulder Width (Acromion to Acromion)
How to measure: Locate the acromion bones—the bony bumps at the very top and outer edge of each shoulder. Run the tape measure from the outer edge of one acromion bone straight across your upper back to the outer edge of the other.
Why it matters: This determines the width of the central back panel of the brace. If this measurement is off, the shoulder caps of the brace will pull inwards (if too small) or sag outwards (if too large).
3. Chest Circumference
How to measure: Lift your arms slightly, wrap the tape around the widest part of your chest (usually right under the armpits), and lower your arms back down to your sides. The tape should be snug but not tight.
Why it matters: The chest strap anchors the entire double shoulder system. A precise chest measurement prevents the brace from riding up toward your neck during physical activity.
4. Bicep Circumference
How to measure: Measure around the thickest part of your upper arm. Do not flex your bicep while doing this; keep the muscle completely relaxed.
Why it matters: The arm straps provide targeted joint compression. Measuring a flexed bicep will result in a sleeve that is too loose when your arm is resting, completely negating the supportive benefits.
Common Measurement Mistakes (And How to Avoid Them)
Even with the best intentions, it is easy to make a slight error that throws off your final size. Watch out for these frequent pitfalls:
- Measuring Over Bulky Clothing: Always measure directly against your skin or over a very thin, form-fitting undershirt. Measuring over a sweater or thick t-shirt will add an inch or more to your true size.
- The "Suck It In" Reflex: When measuring the chest, many people instinctively hold their breath or puff out their chest. Relax. Breathe normally. You want the brace to fit your body as it naturally exists.
- Poor Posture: Slouching significantly changes the width of your shoulders and the curve of your back. Stand tall. Interestingly, people often wonder, do back braces help posture? While a dedicated back brace is explicitly designed for that purpose, proper posture is universally critical when measuring for any upper body support garment.
Fit Verification: Testing Your Accuracy
Once you've matched your numbers to a sizing chart and your new brace arrives, it's time for the ultimate test. But how tight should a shoulder brace be?
You want the brace to feel like a firm, supportive hug—snug, but not strangling. To verify your fit, use these two industry-standard checks:
The 2-Finger Rule: You should be able to slide two fingers comfortably under the straps at your chest and biceps. If you can easily fit your whole hand, the brace is too loose. If you struggle to fit even one finger, it is dangerously tight.
The 3-Step Fit Check:
- Circulation: Check your skin color around the edges of the brace. There should be no discoloration or deep red marks left behind after a few minutes of wear.
- Movement: Mimic the activities you plan to do (like gently mimicking a softball throw or a kayaking paddle stroke). The brace should move with you, not restrict your natural range of motion or aggressively ride up your torso.
- Comfort: Pay close attention to your body's signals.
⚠️ Safety Alert: Beware of Ulnar Nerve Compression
One of the most overlooked dangers of an improperly sized (or over-tightened) shoulder brace is ulnar nerve compression. If your bicep or underarm straps are excessively tight, they can press against the ulnar nerve. If you begin to feel a tingling sensation or numbness traveling down your arm, specifically into your ring finger and pinky finger, remove the brace immediately. This is a clear sign that your brace is too small or adjusted too tightly.

Frequently Asked Questions
What if my measurements fall exactly between two sizes on the chart?
As a general rule, if you are seeking lighter, daily support, round up to the larger size for better comfort. If you are an athlete looking for intense compression and joint stability, round down to the smaller size. However, always prioritize your bicep measurement; if the arm opening is too tight, the brace will be unusable.
I don't have a soft measuring tape. What can I use instead?
Do not use a rigid metal carpenter’s tape. Instead, take a piece of non-stretching string or yarn, wrap it around the measurement points on your body, pinch the spot where the string meets, and then lay that string flat against a standard straight ruler to get your number.
Will my muscles swelling from an injury affect my measurements?
Yes. If you have acute, visible swelling in your shoulder or bicep due to a recent injury, wait for the initial swelling to subside before taking your measurements, or measure your uninjured side as a baseline to ensure the brace will still fit once you've healed.
Next Steps for a Pain-Free Season
By taking the time to accurately measure your shoulder, chest, and bicep, you are taking the most crucial step toward comfortable, effective support. You've eliminated the guesswork and set yourself up for a summer of active living.
However, securing the correct size is only half the battle. Even a perfectly sized brace can cause discomfort if it is put on incorrectly or if the adjustment straps are misused. Now that you know how to find your true size, your next step is mastering the application. Keep your momentum going by learning about the common mistakes people make when putting on and wearing their double shoulder braces—so you can ensure you are getting the maximum benefit from your gear all season long.