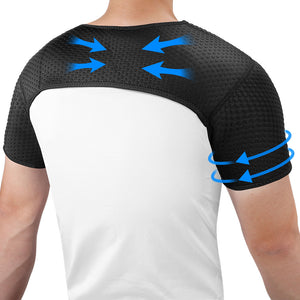
Bicep Brace
- Black
- Grey
- Blue
- Purple
- Pink
- Black
- Dusty Blue
- Blue
- Pink
- White
- Pink
- White
- Yellow
- Purple
- Black
- Black
- Grey
- Grey
- Black
- Blue
- Grey
- Blue
- Black
- Black
- Blue
How do you wrap a bicep tendonitis?
Experiencing a sharp, aching pain in your upper arm or the front of your shoulder? You might be dealing with bicep tendonitis. Wrapping for bicep tendonitis can significantly help reduce pain, provide essential support, and promote faster healing by stabilizing the affected area.
Bicep tendonitis occurs when the tendons connecting the bicep muscle to the shoulder (proximal bicep tendonitis) or elbow (distal bicep tendonitis) become irritated, micro-torn, or inflamed. This upper arm pain is most often due to overuse, repetitive movements, heavy weightlifting, or sports-related strain. While standard recovery protocols like active rest, ice therapy, and physical therapy are absolutely essential for a full recovery, properly wrapping the inflamed area can provide immense additional relief and prevent further damage.
Why Wrapping Helps Bicep Tendonitis Recovery
Applying compression to an injured tendon serves several vital purposes. First, it helps to minimize localized swelling and flush out inflammation. Second, it increases proprioception—your body's awareness of its movement—which naturally discourages you from hyperextending or straining the arm. Finally, a good wrap retains a mild amount of body heat, keeping the muscle and tendons pliable and promoting oxygen-rich blood flow to the damaged tissues.
Step-by-Step Guide: How to Wrap Bicep Tendonitis Correctly
To effectively wrap bicep tendonitis, it is crucial to use a method that simultaneously supports the compromised tendon and allows for a safe range of motion without aggravating the injury. Here are the steps for properly wrapping the area to achieve maximum arm pain relief:
1. Choose the Right Support
Instead of struggling with complicated wrapping techniques using standard elastic bandages, utilizing a high-quality bicep brace is often the most effective option for immediate relief. A dedicated sleeve or strap provides consistent compression and is specifically designed to conform to the anatomy of the upper arm. Look for options with adjustable straps to ensure a secure, customized, but comfortable fit. The ideal support should be crafted from premium, breathable materials to prevent sweat buildup and skin irritation during extended daily wear.
2. Start Below the Elbow Joint
If you are using an elastic compression bandage, begin your wrap just below the elbow where the lower bicep tendon connects. This distal area requires adequate compression to reduce swelling and push fluid upward. Start by securing the wrap firmly around the upper forearm or directly below the elbow joint, ensuring it is flat and free of wrinkles.
3. Wrap Upward Toward the Bicep Muscle
Once you have secured the base, begin overlapping the bandage upward along the bicep muscle in a spiral motion. Gently press the fabric against the tendon to provide stability without restricting your natural blood flow. Each layer should overlap the previous one by about half its width. The wrap must deliver even, consistent pressure from the bottom to the top.
4. Focus on the Upper Arm and Shoulder Area
After securing the lower portion, continue wrapping around the upper section of the arm. Make sure to thoroughly cover the area where the tendon is most inflamed, which is typically higher up near the front of the shoulder joint. If you are utilizing a modern bicep brace, it will generally feature built-in support structures, ergonomic padding, or targeted compression zones to automatically help stabilize this highly mobile joint area without the guesswork.
5. Secure the Wrap Safely
If using a standard bandage, secure the wrap with medical tape or cohesive fasteners at the top, ensuring it stays snug yet comfortable. If you are using a dedicated strap or sleeve, adjust the hook-and-loop closures as needed without causing pinching. The support should stay firmly in place and allow for necessary daily mobility while gently limiting excessive, jerky movements to avoid further tendon strain.
Crucial Tips for Safe Compression
Avoid Over-Tightening
One of the absolute most important aspects of treating arm tendon pain is avoiding over-tightening. Your wrap should provide soothing compression but should never feel restrictive, numb, or cause tingling in your fingers. You should easily be able to slide a finger under the edge of the fabric. Any excessive tightness cuts off vital circulation, which starves the tendon of healing nutrients and can severely aggravate the injury.
Monitor Skin and Circulation
Always check your hand and fingers after wrapping. If your hand turns pale, feels cold, or starts to throb, remove the wrap immediately and reapply it with much less tension.
Integrating Support into a Comprehensive Treatment Plan
Wrapping your arm or utilizing bicep braces provides excellent short-term relief, particularly during physical activity, manual labor, or targeted rehabilitation exercises. However, compression therapy should always be used as one piece of a broader, more comprehensive treatment strategy.
To achieve a full recovery, combine your wrapping routine with active rest, frequent ice application to numb sharp pain, and targeted stretching exercises to strengthen the surrounding shoulder, chest, and back muscles. In severe cases involving intense pain, severe bruising, or suspected bicep tendon tears, always consult a licensed healthcare provider, physical therapist, or orthopedic specialist for further medical recommendations and imaging.
Properly wrapping the arm minimizes the daily strain placed on the affected tendon, limits harmful hyperextension, and actively manages localized inflammation. By using proper wrapping techniques, choosing the right upper-arm support, and adhering to a dedicated recovery regimen, you can accelerate your healing timeline, restore your arm strength, and prevent future reinjury.