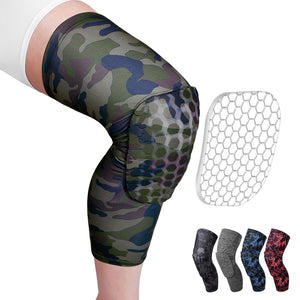
Locking Knee Brace
- Black
- Green
- Orange
- Pink
- Black
- Blue
- Green
- Red
- Orange
- Blue
- Dark Blue
- Black
- White
- Red
- Blue
- Black
- Blue
- Green
- Red
- Blue
- Black
- White
- Red
- Black
- Blue
- Red
- Orange
- Yellow
- Dark Blue
- Grey
- Black
- Blue
- Pink
- Grey
- Black
- White
- Light Black
- Black
- Light Grey
- Grey
- Magenta
- Black
- Green
- Black
- Grey
- Red
- Blue
How to Lock a Hinged Knee Brace?
Whether you are navigating the challenging road of post-operative recovery, rehabilitating a torn ACL, or managing severe joint instability, having the right orthopedic support is non-negotiable. A hinged locking knee brace is an essential piece of rehabilitation equipment specifically engineered to provide maximum structural support to a vulnerable joint. One of its most critical features is the adjustable hinge control, which empowers the wearer to secure the leg in a fixed position or safely restrict the range of motion.
Understanding the Range of Motion Locking Mechanism
Before you secure your joint, it helps to understand the mechanics behind the hardware. A typical orthopedic leg support features rigid metal or composite hinges running along the medial (inner) and lateral (outer) sides of the leg. These hinges are equipped with a specialized range-of-motion (ROM) control system.
This mechanism allows you to dictate exactly how much your joint can bend (flexion) and straighten (extension). By setting specific limits—or immobilizing the joint entirely at a zero-degree angle—a locking hinged knee brace prevents unwanted, sudden movements that could stretch healing ligaments or cause cartilage damage. Mastering this feature allows you to adapt the level of support as you progress through different phases of physical therapy and weight-bearing activities.
Step-by-Step Guide to Securing Your Brace
Securing your joint is about more than just flipping a switch; it requires proper fit and precise alignment. Follow these steps to ensure your hardware is positioned correctly and safely immobilized.
1. Put on the Support Properly
Before you attempt to engage any locks, the foundational fit must be perfect. Slide or wrap the garment up your leg, ensuring the hinges align perfectly with the center of your knee joint. The center pivot point of the hinge should sit parallel to your kneecap (patella). The material should feel snug and secure, but it should never pinch your skin or restrict blood flow.
2. Adjust the Fastening Straps
A stable foundation is required for the hinges to work effectively. Starting from the calf and working your way up to the thigh, tighten each strap firmly. If the straps are too loose, the entire unit will migrate down your leg when you stand, rendering the hinges useless. Ensure each hook-and-loop closure is pressed down flat to minimize shifting during movement.
3. Locate the Hinge Controls
Because orthopedic designs vary, take a moment to inspect the hardware on both sides of your leg. The controls are typically situated directly over the joint line. You might find a simple drop-lock lever, a push-button slider, or a dual-pin dial system that requires inserting small metal pegs at specific degree markers (like 0°, 15°, 30°). Familiarize yourself with how your specific model operates before trying to adjust it while standing.
4. Engage the Locking System
To fully immobilize the joint, you need to activate the stops at the desired angle—often fully straight (0 degrees) for immediate post-surgery walking. If your Locking hinge knee brace uses a lever system, extend your leg fully, then push the levers downward or inward until they snap into the locked position. For button sliders, press them firmly until you hear an audible click. If you are using a pin or dial system, set both the flexion and extension limits to the exact same number.
Crucial tip: Always ensure the degree settings on the inside (medial) hinge match those on the outside (lateral) hinge exactly to prevent dangerous torque and joint misalignment.
5. Test the Stability and Resistance
Once the mechanism is engaged, perform a gentle test. While seated, try to lightly bend and straighten your leg. The joint should remain completely rigid and stable, with the hardware absorbing all the force. If you feel any slipping, clicking, or unexpected give, the lock has not properly engaged. Unlock the mechanism, realign the hinges, and try again.
6. Adjust for Swelling and Daily Comfort
It is completely normal for leg swelling to fluctuate throughout the day, especially after standing or completing rehabilitation exercises. If your leg begins to throb or tingle, the straps may be too tight. You can slightly loosen the thigh or calf straps to relieve pressure, but be careful not to loosen them so much that the rigid sidebars lose their parallel alignment with your leg.
Why Proper Immobilization is Essential for Recovery
Restricting your joints' mobility might feel frustrating, but it is a medically necessary step for a variety of conditions. When recovering from meniscus repairs, patellar tendon injuries, or ligament reconstructions, the newly repaired tissues are incredibly fragile. A sudden slip on a staircase, an awkward twist while turning around, or simply sleeping in the wrong position can instantly compromise a surgical repair.
By using the locking features of your orthopedic support, you relieve mechanical stress on your muscles and tendons. This allows your body's natural inflammatory and healing responses to focus entirely on cellular repair rather than constantly fighting to stabilize an unsupported joint.
Caring for Your Orthopedic Hinge
To ensure your gear continues to function flawlessly, keep the hinge track free of debris, lint, and pet hair. Dirt can easily get trapped inside the dial or lever tracks, making it difficult to fully engage the lock. Occasionally, wipe the metal components with a damp cloth, and avoid submerging the metal hinges in water unless the instruction manual explicitly states it is safe to do so.
Securing your joint with precision is a cornerstone of safe rehabilitation. By taking the time to properly align, strap, and lock your orthopedic gear, you significantly reduce the risk of painful setbacks. Always consult with your healthcare provider or physical therapist to confirm exactly which degree settings and locking protocols are appropriate for your unique stage of recovery.