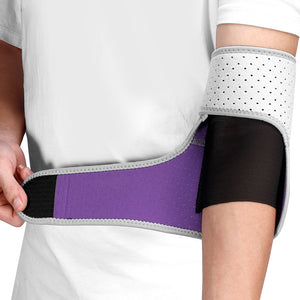
Ankle Belt for Pain
- Black
- Grey
- Blue
- Pink
- Purple
- Black
- Red
- Blue
- Orange
- Black
- Orange
- Green
- Pink
How to Wear an Ankle Belt?
Whether you are recovering from a recent sprain, looking to improve joint stability during intense workouts, or simply seeking daily relief from lingering discomfort, understanding how to properly apply compression to your lower extremities is essential. A well-fitted wrap can drastically reduce swelling, enhance athletic performance, and prevent unwanted twisting motions. However, the benefits of compression and stabilization are only fully realized when the gear is applied correctly.
If you want to maximize your mobility and protect your joints, follow this comprehensive, step-by-step guide on how to put on your ankle wrap for optimal results.
Step-by-Step Guide to Wrapping Your Ankle
Step 1: Prepare Your Gear
Before you even begin, ensure that you have selected the correct size for your specific foot dimensions. A proper fit is a delicate balance: it should wrap snugly around your joint without being so tight that it restricts blood circulation, yet not so loose that it fails to provide the necessary structural reinforcement. Lay your ankle-strap belt flat on a clean surface. Untangle any overlapping sections so that you can easily access and maneuver the fabric as you begin the wrapping process.
Step 2: Position Your Ankle Correctly
Find a comfortable place to sit, such as a sturdy chair, a gym bench, or the edge of your bed. Place your foot flat on the floor, keeping your leg at a natural 90-degree angle. Before applying any wrap, make sure your skin is completely clean and dry. Removing moisture, lotions, or sweat helps the ankle pain belt adhere properly and grip the skin or sock, significantly reducing the risk of slipping, chafing, or skin irritation during movement.
Step 3: Begin the Wrapping Process
Take one end of the ankle belt strap and place it against the narrowest part of your lower leg, which is typically located just above the heel bone and right below the prominent bumps of your ankle bones (the malleoli). Ensure this initial anchor layer is completely smooth and flat against the skin to prevent any uncomfortable bunching. From this starting point, continue to wrap the fabric around your foot and lower leg in a continuous figure-eight or spiral motion. Be sure to overlap each previous layer slightly (by about half the width of the fabric) as you go. This overlapping technique is the secret to creating even, graduated compression and superior joint support.
Step 4: Adjust the Tightness for Optimal Compression
As you navigate the wrap around your heel and arch, pay close attention to the tension. The compression should feel firm and supportive, giving you a sense of security, but it must still allow you to flex your foot and wiggle your toes freely. If you experience any numbness, throbbing, or tingling in your toes, the wrap is cutting off your circulation and needs to be loosened immediately. A good rule of thumb for athletes and active individuals is the "finger test"—you should be able to slide one finger snugly between the fabric and your skin.
Step 5: Secure the Fastening Mechanism
Most modern athletic wraps and compression bands come equipped with a reliable fastening mechanism, such as heavy-duty Velcro. Once you have wrapped the fabric to your desired level of tightness and coverage, press the Velcro firmly down to lock it in place. Smooth out the final edges to ensure the fastening is fully secure and won't catch on your shoes or athletic wear, preventing it from coming undone during a run, a gym session, or a brisk walk.
Step 6: Check for Comfort and Function
Once everything is secured, stand up and carefully put weight on your foot. Walk around your home or the gym floor for a few minutes to test the wrap's functionality. Ensure that it provides the exact stability you need without causing any localized rubbing, pinching, or sharp pain. If you feel any discomfort or notice that the wrap is slipping out of its proper position, sit back down, unfasten it, and readjust the tension.
Additional Tips for Joint Health and Maintenance
- Wear the Right Shoes: Always pair your compression gear with well-fitting, supportive footwear. Tight shoes can alter the way the wrap sits against your skin, causing painful friction blisters.
- Keep Your Gear Clean: To maintain the elasticity and hygiene of your wrap, hand wash it regularly with mild soap and let it air dry. Avoid throwing it in the dryer, as high heat can warp the elastic fibers and ruin the Velcro.
- Listen to Your Body: If you have severe joint instability, chronic conditions like plantar fasciitis, or any specific concerns about your recovery timeline, it is always highly advisable to consult a healthcare professional, physical therapist, or sports specialist. They can offer personalized guidance on whether wearing an ankle support belt is the best choice for your unique situation.